 I spent some of my early career working with POS data. The irony of Point of Sale data is it is really was POS data. I spent a lot of time validating data all sorts of data, one of the big pain points was validating credit card data. When I decided to write a presentation that’s all about SSIS Scripting, the first demo idea that came to me was validating credit card data. In this blog post we will import credit card information from a flat text file. We will feed the credit card data into a Script Component as a transformation. Using the script component we will validate the credit card number against the LUHN algorithm, if the credit card is valid we will also determine the type of credit card. We will create separate flows for American Express, Master Card, Visa, and invalid credit cards. From the flows we will persist the results into their respective flat text files.
LUHN Algorithm
Before we get into the SSIS package definition having a basic understanding of the LUHN algorithm and factors for credit card types may be useful. The LUHN algorithm uses the last digit in the credit card number as a check digit. Then by processing the remaining numbers with a specific set of rules, shown below, we can calculate what the check digit should be.
- Save and removed the last digit from the CC Number. This digit is what we will use to check against the calculated check digit
- Starting with the last digit and working backwards, double every other value (the odd spaces) any result higher than 9 summing the digits 18 == 1 + 8 == 9
- Add all the numbers together and multiply by 9
- The check digit (that the last number of the card) should match the result modulus 10
Here is the implementation of the LUHN algorithm in C#.net.
private bool IsLUHN(string CCNumber) { /******************************************************************************************************************************************** The LUHN Algorithm: 1. Save and removed the last digit from the CC Number. This digit is what we will use to check against the calculated check digit 2. Reverse the array, this is easier than going backward in an array from the last position. 3. Multiply the values in the odd indexes by 2 and subtract 9 from any result higher than 9. This is the same as summing the digits 18 - 9 == 1 + 8 4. Add all the numbers together and multiply by 9 5. The check digit (the last number of the card) is the amount that you would need to add to get a multiple of 10 (Modulo 10) ********************************************************************************************************************************************/ char[] charArray; int[] intArray; int lastValue; int sum = 0; int checkDigit = 0; // Convert Credit Card Number to an integer Array charArray = CCNumber.ToCharArray(); intArray = Array.ConvertAll(charArray, value => (int)Char.GetNumericValue(value)); // Store the last value of the CC, this will be the check bit. lastValue = intArray[intArray.Length - 1]; // Step 1 drop the last digit from the array Array.Resize(ref intArray, intArray.Length - 1); // Step 2 Reverse the array Array.Reverse(intArray); // Step 3 Double the odd array entries for (int i = 0; i < intArray.Length; i++) { if (i % 2 == 0) { intArray[i] *= 2; if (intArray[i] > 9) intArray[i] -= 9; } // Step 4 Sum the array values. sum += intArray[i]; } // Steps 4 and 5 multiple sum by 9 and get the last digit by using modulus 10. checkDigit = (sum * 9) % 10; return checkDigit == lastValue; } |
Credit Card Types
There are more credit card types, and rules, than what we are going to look at in this blog post. For simplicity we are going to use American Express, Visa, and Master card and only look the beginning numbers of the credit card to determine the card type. In the table below are the rules that we will use for this blog post
| Credit Card Issuer | Starts With |
|---|---|
| American Express | 34, 37 |
| Visa | 4 |
| MasterCard | 51, 52, 53, 54, 55 |
Credit Card Validation SSIS package
The Credit Card Validation SSIS package will open a flat text file in the data flow as its source, process the flat text file through a script component transformation and depending on the results of the LUHN validation and credit card number rules, we will send to one of four outputs. Each of these outputs will be written to flat text files for persistence.
Let’s start by creating a new SSIS package and name it CCValidation. We will use five flat text file connection to either read or write data to. The following flat text file connection will be created to support the file processing.

Each of the flat file connections are setup the same, except for the file name. The file name will be unique to each file.
| connection Name | Path |
|---|---|
| CCValidationData | \\localhost\Development\SSIS\Files\CCValidation\CCValidationData.txt |
| InvalidCCData | \\localhost\Development\SSIS\Files\CCValidation\CCValidationInvalid.txt |
| ValidAmex | \\localhost\Development\SSIS\Files\CCValidation\CCValidationAmex.txt |
| ValidMC | \\localhost\Development\SSIS\Files\CCValidation\CCValidationMC.txt |
| ValidVisa | \\localhost\Development\SSIS\Files\CCValidation\ CCValidationVisa.txt |
Flat File Connections
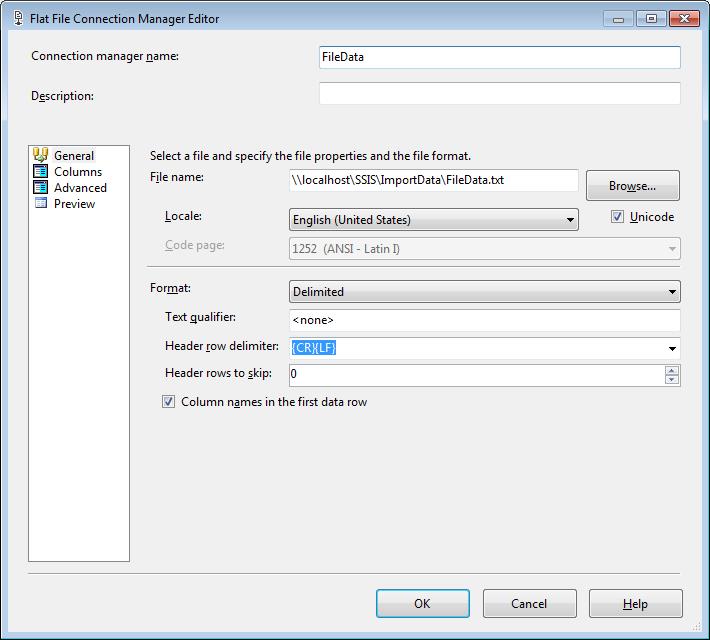
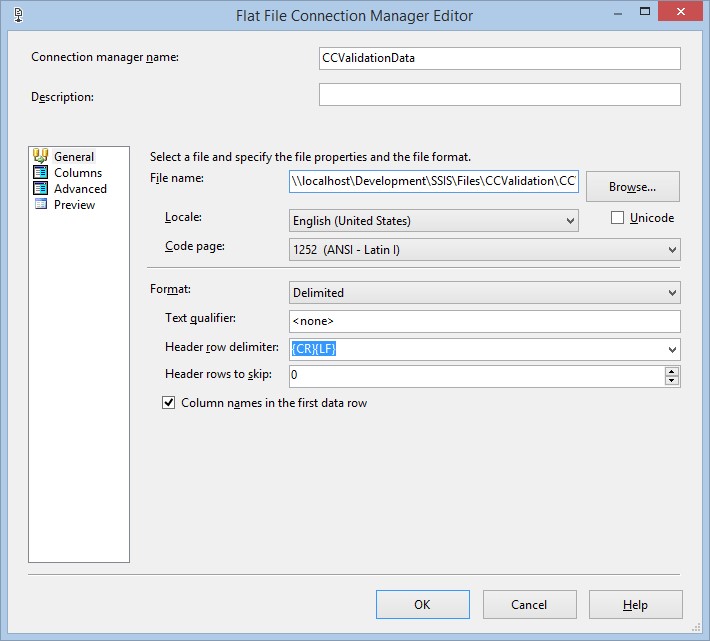
In the general section of the flat file connection manager editor we will use a file name from the table above. Our files have header information, so we will need to check the “Columns names in the first data row” option.
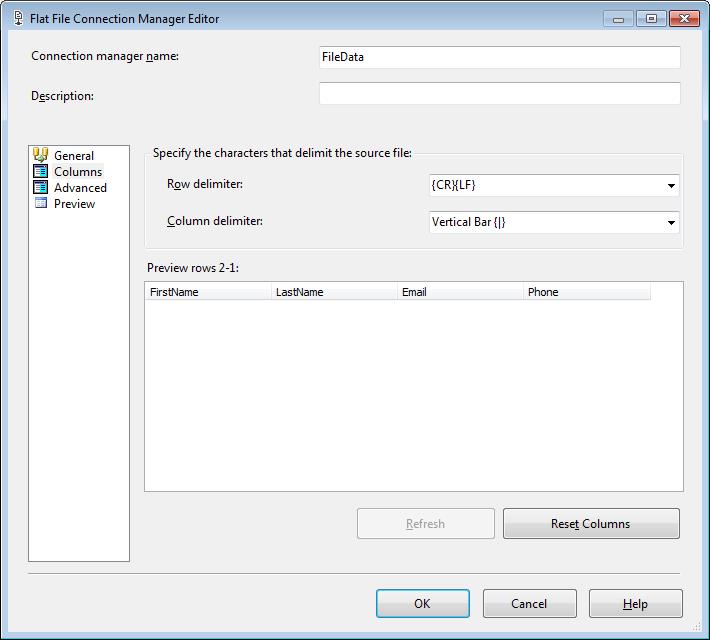
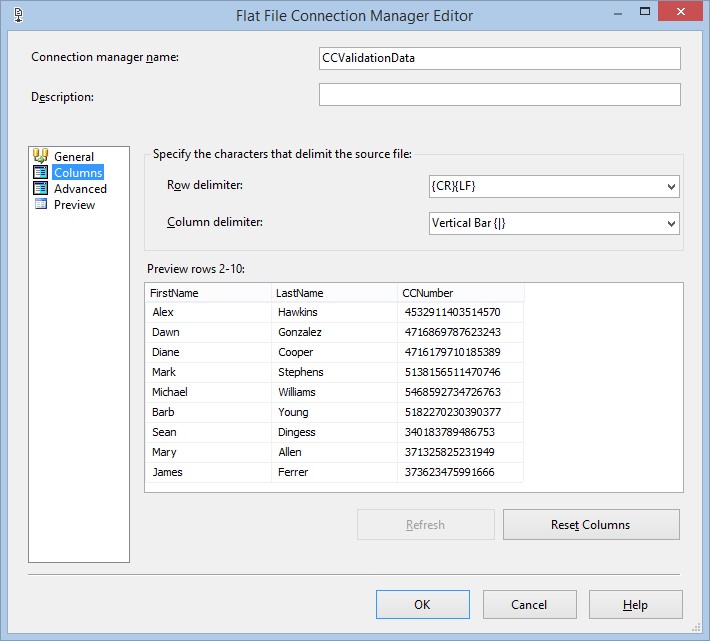
In the columns section of the flat file connection manager editor we will select the Vertical Bar {|} value for the Column delimiter drop down list, because the flat text file is pipe delimited.
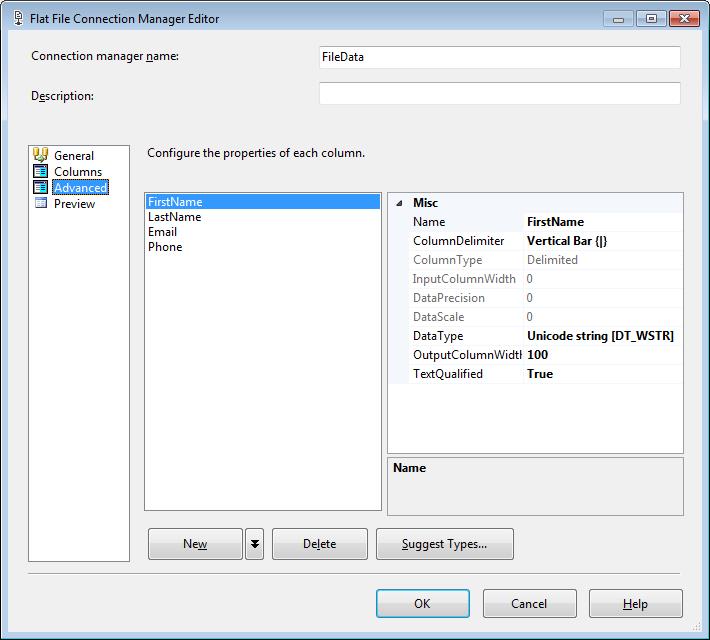
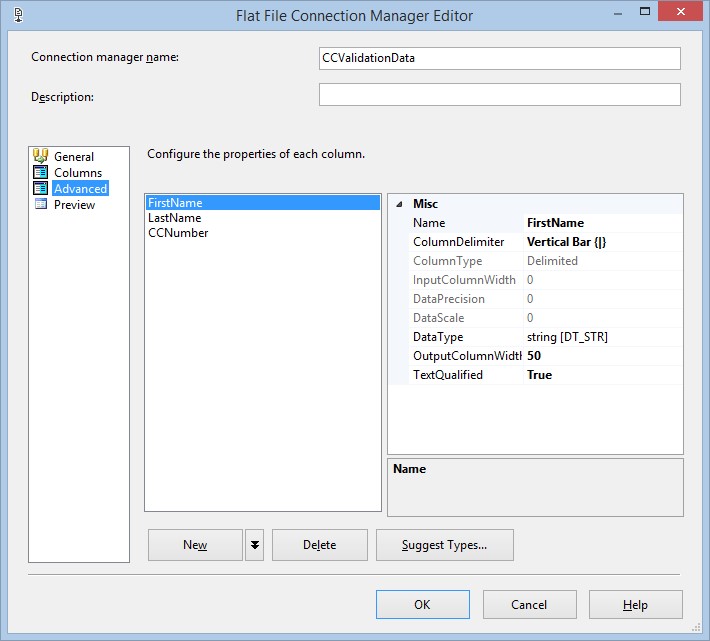
In the Advanced section of the flat file connection manager editor we will need to adjust each of the columns to match the data size and type for the corresponding database column.
Package Tasks
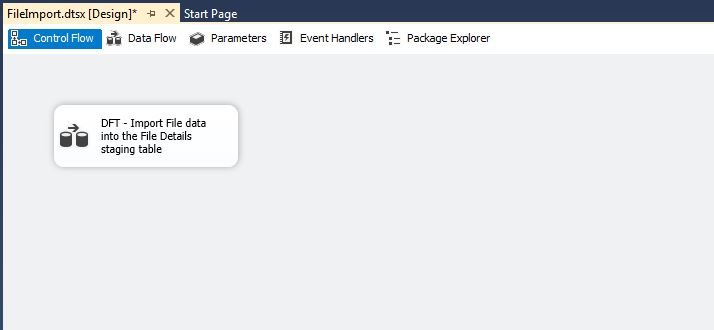
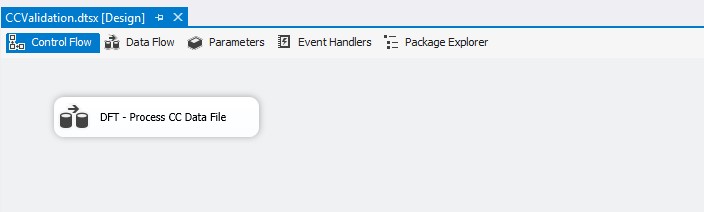
DFT – Process CC Data File
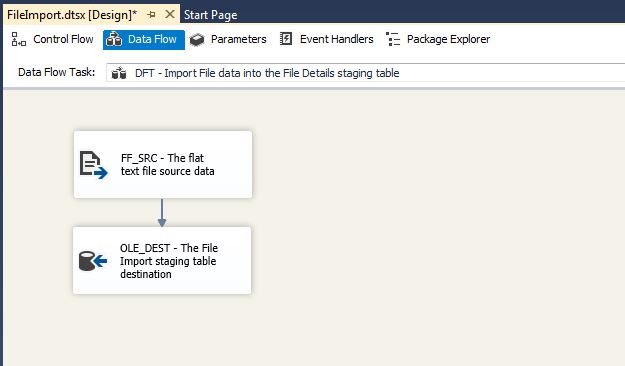
The Credit Card Validation SSIS package will use a single Data Flow task to validate the credit card data. This Data Flow task “DFT – Process CC Data File” implements the credit card validation process, using a Flat File Source, Script Component and flat text file destinations.
Data Flows
DFT – Process CC Data File
This data flow implements a total of six components a Flat File Source for the source of the credit cards, a Script Component for splitting the data flows based on credit card logic, and four flat file text file destinations for persisting the resulting output from the script component.
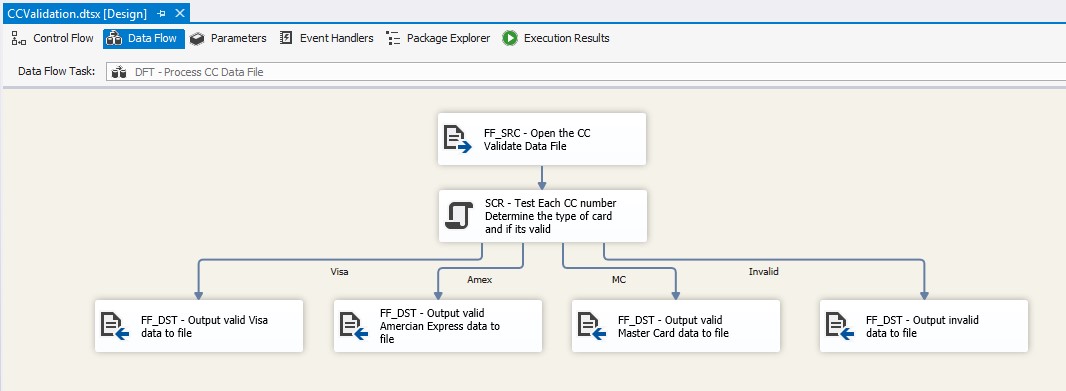
FF_SRC – Open the CC Validate Data File
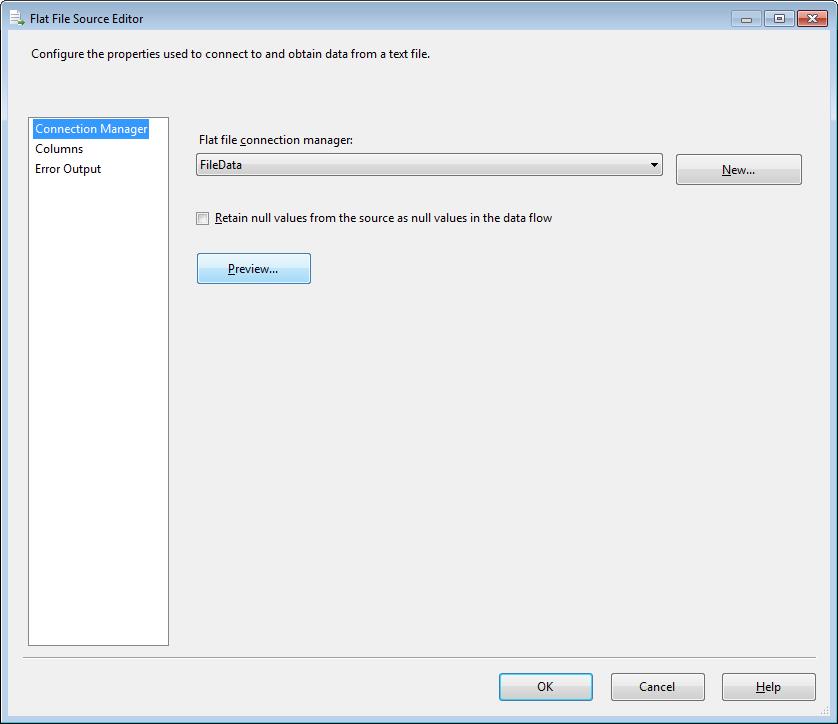
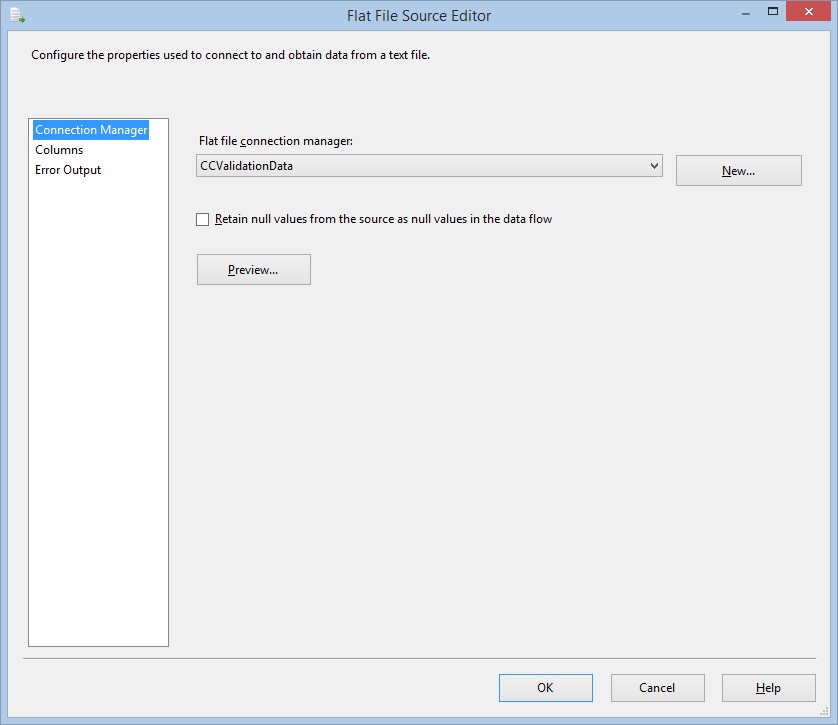
This data source will define the connection manager and the output columns from the flat text file into a data stream. This data stream will provide the input to the script component. On the connection manager section select the CCValidataionData flat file connection manager.
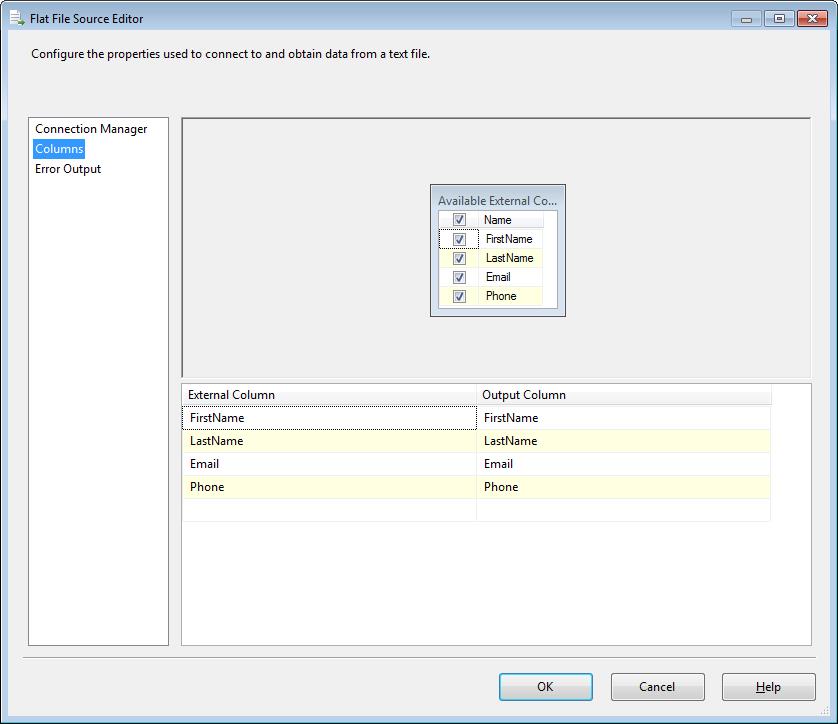
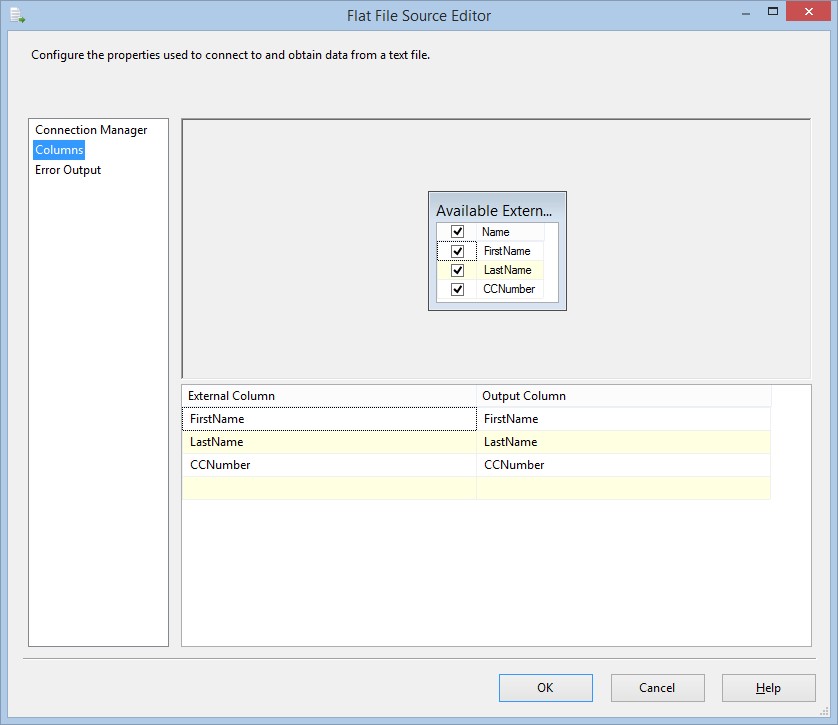
On the Columns section, we will output all three columns; FirstName, LastName, and CCNumber. As a best practice, if you are not going to use one of the columns in the data flow, its best to deselect it hear. It will takes up less space on your data stream, increase the performance of your package, and prevent warnings that would be written to log files.
SCR – Test Each CC number Determine the type of card and if its valid
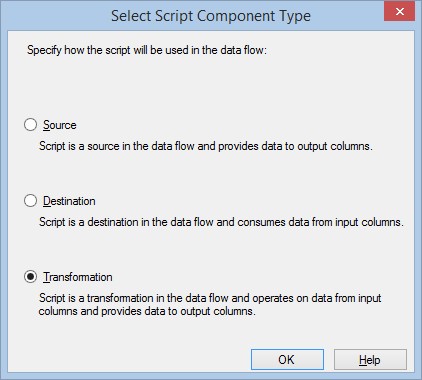
This Script Component will be used to validate that credit card data is valid by implementing the LUHN algorithm. We will also create data flows for each different credit card type that we find; American Express, Master Card, and Visa. When we first drop the Script Component to the Data Flow window the “Select Script Component Type” window will appear, select the Transformation.
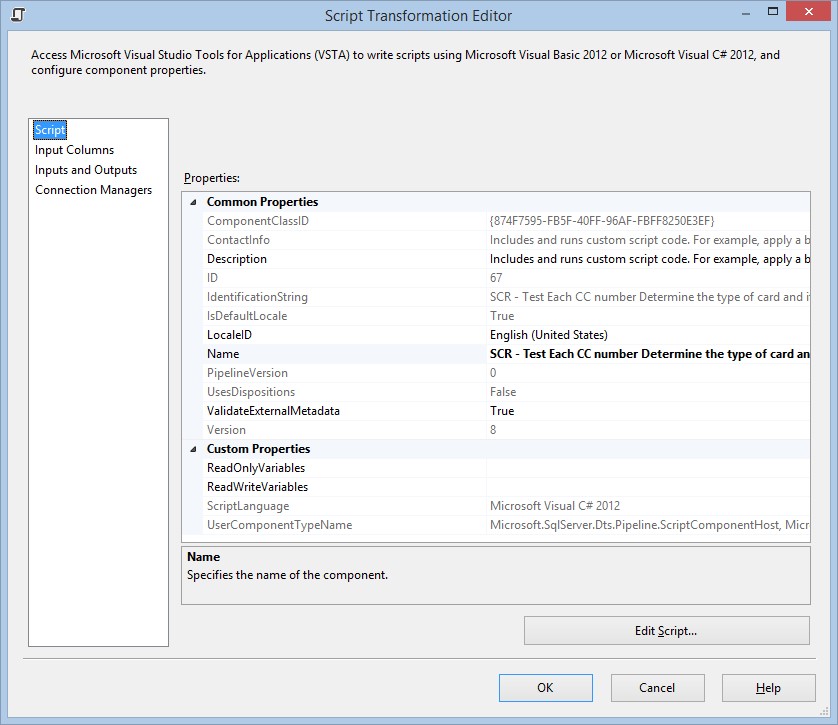
Typically declaring the Read and Write variables would be done on the Script section of the Script Transformation Editor. However, in this Script Component we will not be using any variables.
Before we click on the Edit Script… button, we need to define out inputs and outputs. On the Input Columns section, we are going to select all three columns (FirstName, LastName, CCNumber) to be included in the data flow. Notice the Input Name (Input 0), this will become an object type that we can use in the script.

In the Inputs and Outputs section, will define the input and the four outputs MC, Invalid, Visa and Amex. We could change the name of the input in Common Properties for the Input 0, however for this package will leave the default name of Input 0. We will select the Add Output button for each of the four outputs and name them. These outputs will become buffer objects in the data flow.

On each of the outputs we will add three columns; FirstName, LastName, and CCNumber. Each of the columns that we add, will become properties in the buffer object in the data flow. Using the Common Properties we will define the types for each of the columns. For this Script Component all columns will be 50 character strings.

We will now define the code that will implement out validation logic as well as separate the different types of credit cards. Here is the Input0_ProcessInputRow method. This method will be called one time for each row that is found in the flat text file. It will take the contents of the row and put them in the Row variable. Using the Row variable we can access the FirstName, LastName, and CCNumber properties. Each of our outputs can be accessed through buffer objects that are created when we defined out outputs. Amex == AmexBuffer, Visa == VisaBuffer, MC ==MCBuffer and Invalid = InvalidBuffer. Using these buffer objects we can add rows and give values to either FirstName, LastName, or CCNumber.
public override void Input0_ProcessInputRow(Input0Buffer Row) { if (IsLUHN(Row.CCNumber)) { /* Credit Card Issuer Starts With American Express 34, 37 Write to the Amex Buffer and write to the Valid Amex File. */ if ((Row.CCNumber.StartsWith("34")) || (Row.CCNumber.StartsWith("37"))) { AmexBuffer.AddRow(); AmexBuffer.CCNumber = Row.CCNumber; AmexBuffer.FirstName = Row.FirstName; AmexBuffer.LastName = Row.LastName; } /* Credit Card Issuer Starts With Visa 4 Write to the Visa Buffer and write to the Valid Visa File. */ else if (Row.CCNumber.StartsWith("4")) { VisaBuffer.AddRow(); VisaBuffer.CCNumber = Row.CCNumber; VisaBuffer.FirstName = Row.FirstName; VisaBuffer.LastName = Row.LastName; } /* Credit Card Issuer Starts With MasterCard 51, 52, 53, 54, 55 Write to the MC Buffer and write to the Valid MC File. */ else if ((Row.CCNumber.StartsWith("51")) || (Row.CCNumber.StartsWith("52")) || (Row.CCNumber.StartsWith("53")) || (Row.CCNumber.StartsWith("54")) || (Row.CCNumber.StartsWith("54"))) { MCBuffer.AddRow(); MCBuffer.CCNumber = Row.CCNumber; MCBuffer.FirstName = Row.FirstName; MCBuffer.LastName = Row.LastName; } // CC Number is not Amex, MC, or Visa so move to Invalid buffer and write to Invalid File. else { InvalidBuffer.AddRow(); InvalidBuffer.CCNumber = Row.CCNumber; InvalidBuffer.FirstName = Row.FirstName; InvalidBuffer.LastName = Row.LastName; } } // CC Number did not pass the LUHN Algorithm add to the Invalid Flow and write to the Invalid File. else { InvalidBuffer.AddRow(); InvalidBuffer.CCNumber = Row.CCNumber; InvalidBuffer.FirstName = Row.FirstName; InvalidBuffer.LastName = Row.LastName; } } |
Looking at the American Express section of code the IF statement looks to see of the incoming credit card number, accessed through the Row variable, starts with either 34 or 37. If the credit card starts with either 34 or 37, we will call the AddRow() method on our buffer object. This will create a new row on our data flow that we can add values to. All we have to do now is set the FirstName, LastName and CCNumber properties in our buffer object, in this case AmexBuffer, to the respective values in the Row Variable. The other three inputs all follow this same logic.
/* Credit Card Issuer Starts With American Express 34, 37 Write to the Amex Buffer and write to the Valid Amex File. */ if ((Row.CCNumber.StartsWith("34")) || (Row.CCNumber.StartsWith("37"))) { AmexBuffer.AddRow(); AmexBuffer.CCNumber = Row.CCNumber; AmexBuffer.FirstName = Row.FirstName; AmexBuffer.LastName = Row.LastName; } |
FF_DST – Output valid Visa data to file
FF_DST – Output valid Master Card data to file
FF_DST – Output valid American Express data to file
FF_DST – Output invalid data to file
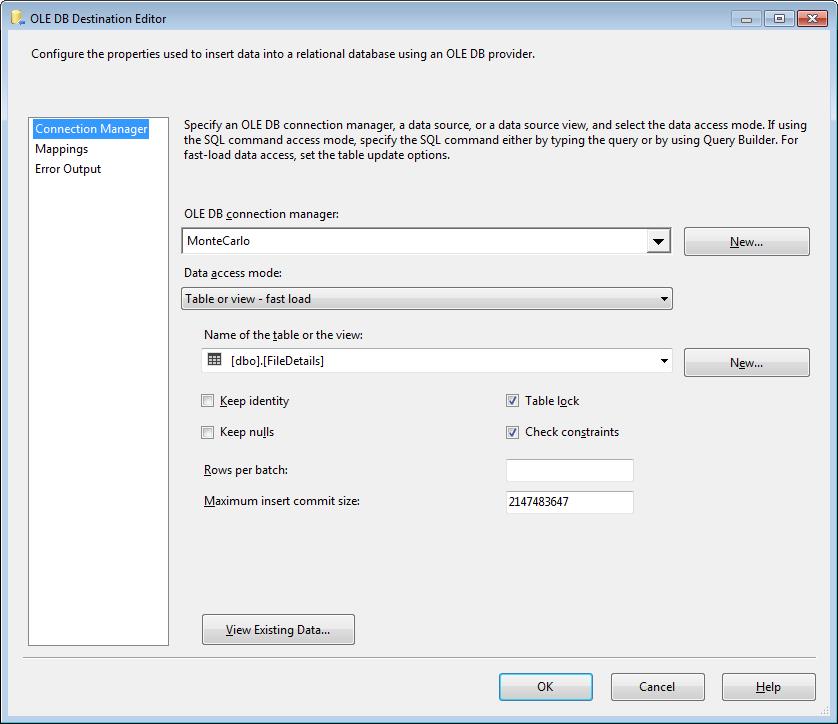
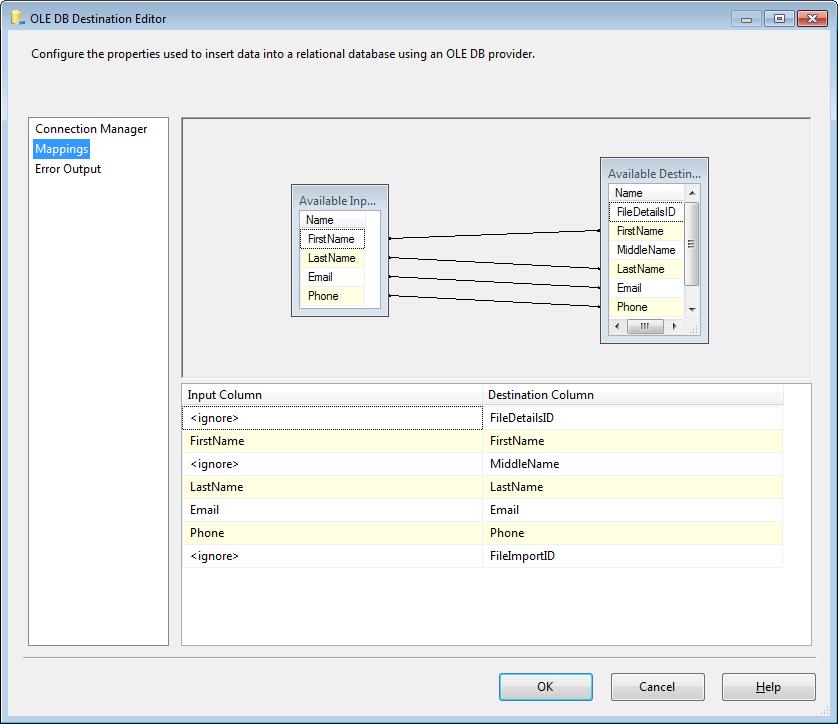
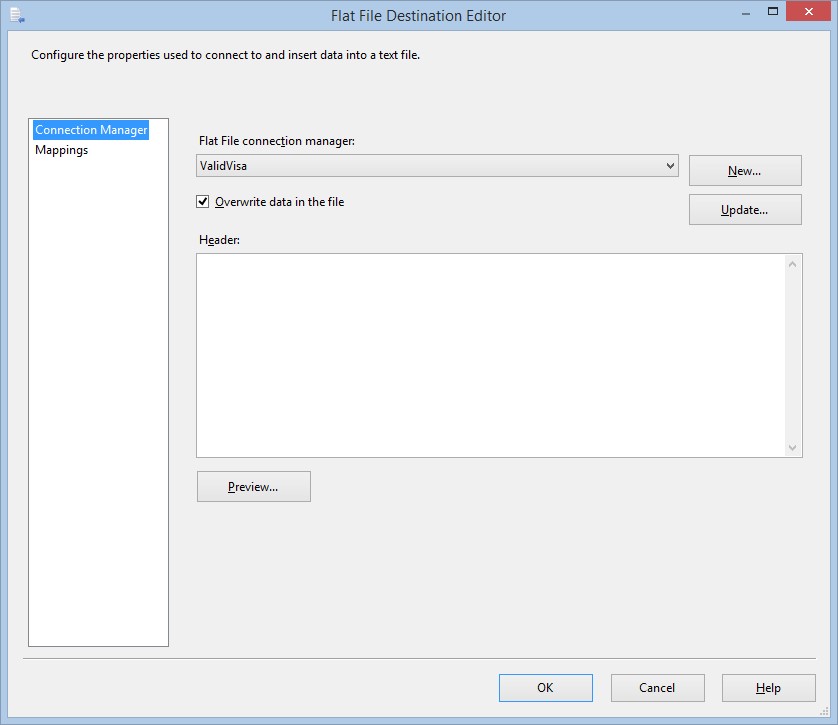
Each of these Flat File Destinations will define the details of the destination of our data into the flat text files and which data stream columns will be mapped to which flat text file columns. When we map each output from the script component it should correlate to the corresponding file type. Being that all of the Flat File Destinations are equivalent we will only look at a single one. In the Connection Manager section, we will select the appropriate Flat File Connection Manager.
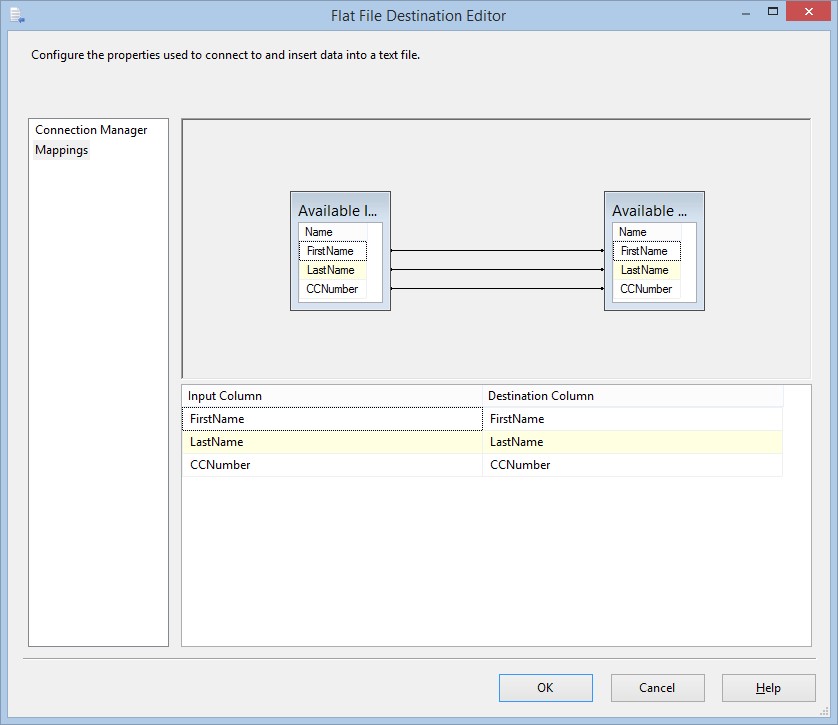
On the Mappings section, if the Flat File Destination can match the names, lines will be drawn connecting the two columns. If any columns are not automatically mapped, we will either need to drag and drop the column on the corresponding columns that should be mapped, or select the corresponding column value from the Input Column drop down list.
Execution
After the package is executed the credit card data will be loaded into one of four flat text files. Depending on if the credit card data is valid, invalid, or a specific type the file details will be into the respective file type. There you have it, a credit card validation SSIS package.